


At Monkeytag, we have this incredible urge to one-up ourselves every year in everything we do, and 2017’s holiday gift was no exception. Our team came up with the idea to embrace the Monkeytag name during our brainstorming session by making a custom toy figurine.
However, the challenge we faced was that we had never ventured into toy making before, so we knew there would be a lot to learn. To help others understand what goes into the process of making a custom toy, we wanted to share a few tips on what we learned along the way.
Where Do You Start?
- Vendor – It all begins with finding the perfect vendor/broker that:
- Has great relationships with production factories. There is a good chance your production facility will be located overseas. With realistic timelines and competitive pricing per unit, it is important that vendors can effectively manage the project internationally.
- Can model and 3D render your design with correct measurements so you can accurately gauge how the finished product will look.
- Can give you as much information as possible. Communication is key upfront in determining pricing, material, design, etc. Working with a vendor who understands your needs will ultimately save you time and stress in the end.
Tip: We selected the amazing Shinbone Creative located in Austin, TX to help us with making a custom toy.
Designing Your Toy
There are 10 insights we gained when making a custom toy design that will help save time and money, while also making your dream toy a reality.
- Quantity – Quantity will dictate a lot in your toy, from the best material to use (mold and figurine) and project timeframe. You may want to get 2,000 figures made upfront and have them painted as different characters in batches of 500. Or you may only want 100 figurines in total. Each option has different results, procedures, and costs. Talk with your vendor to determine the best strategy for your unique needs.
- Material – Our team was surprised with the limited amount of materials available, but it is important to research your options since materials can dictate the versatility of your toy.
- Resin requires fewer upfront costs but result in a higher price per unit since this type of production relates to doing smaller quantity runs of approximately less than 300 units.
- Rotocast vinyl allowed our monkey figurine to have articulated appendages at a lower price per unit but required higher upfront investment costs.
- Basic quantities of scale figured that 50 resin figures could be around $5,000 with a price per unit at $100, and 1,000 rotocast vinyl figures could be around $13,000 with a price per unit of $13. Our team went with resin figures for our first run but is currently creating a rotocast vinyl toy series.
- Mold Type – Deciding on a figurine material will help you determine what material you can use for your mold. Our options were silicone and metal. After looking at the pros and cons of each, we choose a silicone mold for our resin figure to help keep the cost low. Silicon molds wear out after 30 – 50 uses. Metal molds last forever and are part of the investment when choosing to do rotocast vinyl, but if you plan to make lots of toys, this is the best route to go.
- Shape & Style – It is best to look at all options available to you. Our team reviewed other toys in person and online to help create the final look. It is also helpful to come up with multiple shapes and sizes and then work with your vendor to determine the best option. If you start the process with a character already in mind – try creating a 3D version yourself to ensure your vision can be replicated.
- Artwork – Artwork can be created in many ways. If you are not an artist or designer by trade, then be sure to find a toy broker who can do the artwork for you since it’s important that any two-dimensional art can be accurately transferred onto a three-dimensional figure. If you are a designer and work in Adobe Illustrator, it’s key to strategize artwork to be easily adaptable to a physical model. You also need to understand how art is applied, as designs can be applied to your toy using techniques ranging from paint to decals or tape. A lot depends on how intricate you wish the final toy to look.
- Prototypes – These prototypes or test pulls will act as milestones for how the toy project moves along. Your first test pull will occur early in the tooling process when determining how the shape of the figure should look. This is important as whatever is approved at this stage will begin the first production steps in casting your official toy mold. After the mold is cast, your final artwork will be applied to a sample pull to be reviewed. Again, your toy broker must have a good relationship with production factories since any changes to the artwork at this stage will need to be perfectly communicated. Any delays here can result in longer production timelines.
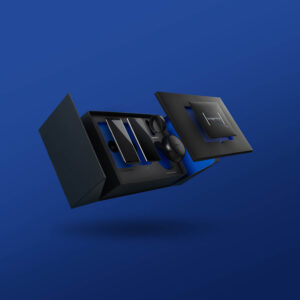
- Packaging – When you do a large rotocast vinyl toy run, one of the perks typically included in the production costs is toy packaging. In the later stages, the factory will provide a box dieline so you can apply custom artwork to your toy box. A vacuum-formed tray that holds the figure inside the box will also be included. Double-check with your toy broker to make sure toy packaging will be included in the production.
- Timing – This varies depending on your timeline and what type of material you use for your toy. If you do a small resin production run, you could be looking at a couple of months from design to delivery. If you do a large rotocast vinyl run, expect the project to take 6-7 months from start to finish.
- Shipping – When working with your toy broker, be sure to inquire about different shipping methods. Factories overseas typically freight by air and/or sea, with the sea being the most common to help reduce costs. Expect your toys to have to clear customs checks and the wear and tear of shipping. Costs additionally are determined by volume and weight of packaging, so depending on the number of toys ordered, shipping costs could range from $1,000 to $4,000 or more.
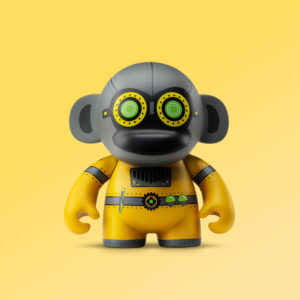
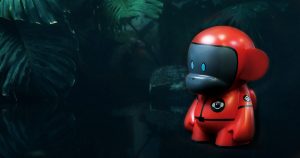
In the end, our final figurine – the first of many to come – turned out so much better than expected. The best part was opening the box and seeing our vision, designs, and hard work come to life. The toy was a huge hit with our clients, and we are now working on future renditions. And if this agency stuff doesn’t work out for us, it is nice knowing we have a backup in the toy-making sector!

Related: Check out our final resin toy product, named Able 6, and the new mascot of Monkeytag that was included in our Holiday Gift Kit project. Also, take a closer look at the full set of rotocast vinyl toys in the branded version of The Simians.